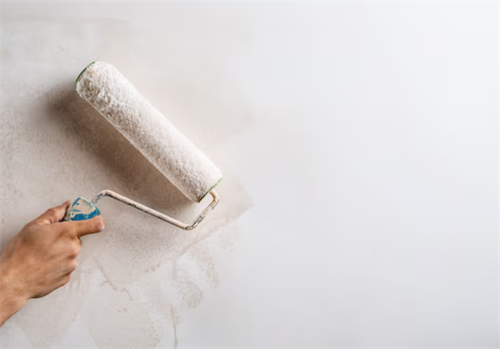
Mastering Sealant Application: The Key to a Durable and Beautiful Home
When it comes to home improvement and interior design, many people focus on large elements—furniture, lighting, flooring, or color schemes. Yet often, it’s the small details that determine whether a home looks polished and performs well over time. One of the most overlooked details is sealant application.
Sealants may not sound glamorous, but they play a vital role in both aesthetics and functionality. From kitchens and bathrooms to windows, doors, and flooring, proper sealing prevents water damage, mold, dust infiltration, and heat loss. At the same time, it creates smooth transitions and clean finishes that make a home feel professionally completed.
This article will guide you through everything you need to know about sealants in home decoration: the different types, tools you’ll need, essential application techniques, and the critical spots in your house that require sealing. Whether you’re renovating, decorating a new build, or simply refreshing your interiors, these tips will help you achieve a flawless result that lasts.
Why Sealants Matter in Home Decoration?
Sealants serve as protective barriers, filling spaces, keeping out moisture, and ensuring surfaces remain hygienic and steady.Without them, small cracks and joints can become entry points for water, grease, and dust, eventually causing mold, stains, or structural weakening.
In interior design, sealants also serve a cosmetic purpose. They smooth transitions between different surfaces—like a countertop meeting a backsplash or a door frame against a painted wall—giving interiors a refined, seamless look. Choosing the right sealant and applying it properly is therefore essential not just for durability, but also for maintaining elegance in your home.
Types of Sealants and Their Features:
Before diving into techniques, let’s look at the most common sealants used in home decoration.
1. Silicone Sealant
Best for: Bathrooms, kitchens, glass, and areas exposed to water.
Advantages: Excellent flexibility, waterproofing, and weather resistance. It performs well in extreme temperatures.
Notes: Available in acidic and neutral forms. Acidic silicone cures quickly but may corrode metals; neutral silicone is slower to cure but safer on sensitive surfaces.
2. Polyurethane Sealant
Best for: Outdoor joints, floors, and heavy-duty sealing where durability is essential.
Advantages: Strong adhesion, high resistance to abrasion, oils, and water. Ideal for areas with frequent movement or moisture.
Notes: Dries faster than silicone and provides greater structural strength, though it may require more careful application.
3. Acrylic Sealant (often called Caulk)
Best for: Indoor decorative joints, baseboards, trims, and cracks in walls.
Advantages: Paintable, available in many colors, and ideal for finishing touches. It enhances aesthetics while sealing minor gaps.
Notes: Less elastic than silicone, so it’s not ideal for wet or high-movement areas.
4. Specialty Sealants
Anti-mold sealants (for humid spaces like kitchens and bathrooms).
Fire-resistant sealants (around fireplaces or heating systems).
Transparent sealants (for glass, acrylic, or modern minimalist interiors).
By understanding the properties of each, you can choose the right product for each part of your home.
Essential Tools for Sealant Application:
To achieve professional results, you’ll need the right tools.
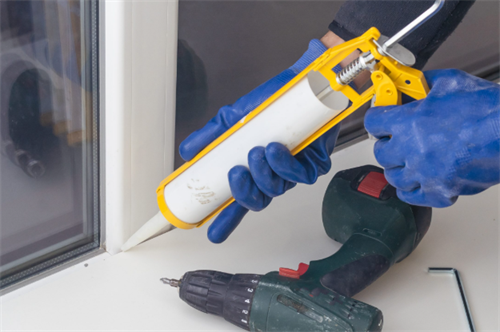
1. Caulking Gun
Available in manual and electric versions.
Manual guns are affordable and perfect for small jobs.
Electric guns provide smoother, faster application for larger projects.
2. Nozzles
The nozzle shape determines the bead of sealant.
Straight nozzles for flat lines.
Angled nozzles for corners.
Round nozzles for pipes or curved edges.
3. Smoothing Tools or Scrapers
Used to press the sealant firmly into gaps and smooth the surface.
Plastic scrapers are ideal for delicate surfaces, while metal scrapers are more effective for heavy-duty removal tasks.
4. Masking Tape
Helps keep edges sharp and prevents overflow onto surrounding surfaces.
5. Cleaning Supplies
A solvent (such as alcohol or acetone) for preparing surfaces.
A clean cloth to wipe away excess material.
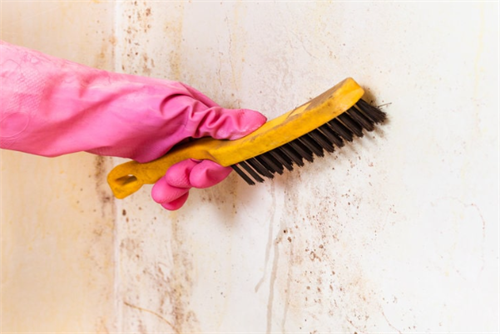
Preparation Before Applying Sealant:
The secret to long-lasting sealant is preparation. Even the best product won’t adhere properly if surfaces are dirty or damp.
1. Clean Thoroughly
Remove dust, grease, mold, or old sealant. Use alcohol, detergent, or a specialized cleaner depending on the surface.
2. Dry the Area
Moisture prevents adhesion. Ensure no moisture remains on the surface before sealing.
3. Choose the Right Sealant
Match the product to the material and environment—anti-mold silicone for bathrooms, paintable acrylic for trims, or polyurethane for heavy-duty use.
4. Prepare Tools
Cut the nozzle at a 45-degree angle to match the gap width. Load the sealant into the caulking gun and test on a scrap surface first to check flow.
Step-by-Step Sealant Application Techniques:
Now that everything is ready, let’s go through the process.
1. Cutting the Nozzle
Be sure to cut the nozzle neatly at a slight angle.The opening should be just wide enough to fill the gap—too small and the bead will be weak, too large and it will be messy.
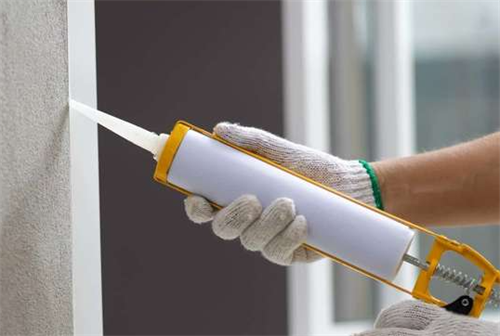
2. Applying the Bead
Hold the gun at a 45-degree angle.
Apply even pressure as you glide along the joint without stopping.
Avoid stopping mid-line, as this creates uneven spots.
3. Smoothing the Sealant
Immediately after applying, smooth the bead with a scraper or your finger dipped in soapy water. This ensures the sealant bonds firmly and creates a neat finish.
4. Cleaning Excess
Remove masking tape while the sealant is still wet, then wipe away any extra material with a damp cloth.
5. Curing Time
Allow the sealant to cure fully—this may take 24 to 72 hours depending on the type. Avoid touching or wetting the area during this time.
Critical Areas in the Home That Need Sealant:
Not every joint requires sealing, but certain spots are absolutely essential for both functionality and aesthetics.
1. Kitchen Countertops
Seal between the countertop and backsplash or wall.
Prevents food particles, grease, and water from slipping into gaps.
Always use mold-resistant silicone.
2. Sink and Faucet Areas
A prime spot for water exposure.
Proper sealing stops leaks and keeps cabinetry dry.
3. Bathroom Fixtures
Around bathtubs, showers, and sinks.
Use waterproof, anti-mold silicone to prevent mildew and staining.
4. Toilet Base
Sealing the base improves hygiene and prevents water seepage.
Choose a strong, durable sealant resistant to frequent cleaning.
5. Cabinet Edges
Particularly for bathroom vanities, which face constant moisture.
Sealing prevents swelling and extends lifespan.
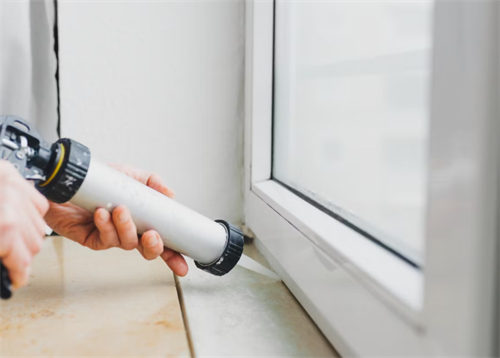
6. Window Frames
Indoor side: decorative acrylic or silicone to prevent drafts.
Outdoor side: weather-resistant sealant to block rain and wind.
7. Door Frames and Skirting Boards
Tiny gaps between walls and trim can accumulate dust and give an incomplete appearance.
Paintable acrylic sealant provides a smooth, seamless look.
8. Floor Edges
Especially in kitchens and bathrooms.
Prevents water infiltration and improves cleanliness.
9. Ceiling Corners or False Ceiling Panels
Adds stability and prevents cracks from showing.
10. Pipes and Ducts
Seal around pipe penetrations to block air leaks, insects, or moisture.
Choosing the Right Sealant Color:
Sealants come in more shades than just white or transparent. Matching or contrasting colors can enhance your home’s look:
-White: Clean, classic, blends well with tiles, sinks, and sanitary ware.
-Transparent: Invisible finish, ideal for glass, stainless steel, or minimalistic designs.
-Colored Sealants: Match wood, paint, or flooring for a seamless effect.
-Pro tip: Always test a small section before applying extensively.
Maintenance and Replacement:
Even the best sealant won’t last forever. Over time, exposure to heat, water, and cleaning agents can cause cracks, peeling, or discoloration.
Inspect annually. Look for gaps, mold, or shrinkage.
Replace when necessary. Scrape away old material completely before reapplying.
Inexpensive sealants can degrade quickly, leading to higher long-term expenses.
Safety Considerations:
Sealants are chemical products. Follow these precautions:
Work in a well-ventilated area.
Wear gloves to prevent skin irritation.
Avoid direct contact with eyes or prolonged inhalation.
Store unused sealant in a cool, dry place.
Sealant may seem like a minor detail in home decoration, but it’s one of the finishing touches that separates a sloppy DIY job from a professional-looking space. It keeps your home clean, dry, and durable while enhancing its overall appearance.
RELATED GUIDES

Mastering Sealant Application: The Key to a Durable and Beautiful Home
When it comes to home improvement and interior design, many people focus on large elements—furniture, lighting, flooring, or color schemes.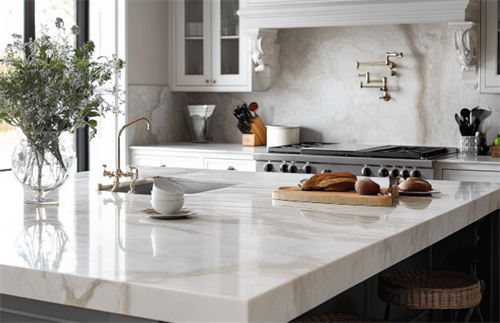
Marble vs. Quartz Countertops: The Ultimate Guide for Your Kitchen Remodel
Hey there, home renovators and kitchen lovers!Let’s talk about one of the biggest decisions you’ll make during a kitchen remodel: the countertops.
Whole House Audio vs. Smart Speakers: Which Audio System Is Right for You?
Music isn’t merely background—it can shape the atmosphere, influence your mood, and enrich daily life.As technology has advanced, homeowners now have multiple ways to enjoy audio throughout their homes.
Children's Room Furniture Guide: Adjustable Design Plans for Growth
If you're a parent, you've probably stood in the middle of a children's furniture store and felt completely overwhelmed.