Wall Stain Removal Guide—Make Your Home More Beautiful
Between the hustle and bustle of daily routines, the joyful chaos of children and pets, and the simple passage of time, our walls can take a beating. What was once a pristine canvas can become a gallery of scuffs, stains, and mysterious marks.You don't need a team of professional painters or a cabinet full of harsh chemicals to restore them. Often, the most effective solutions are simple, affordable, and already in your pantry.
Understanding Your Wall's Personality: Paint Types Matter
Before we dive into solutions, a quick but crucial primer. Not all walls are created equal. The first step to cleaning effectively is knowing what you're working with.
-Washable Walls (Latex/PVA Paint): Most modern homes have walls painted with latex-based paints. These are durable and can handle gentle scrubbing with a damp cloth and mild detergent. You can test this by wiping a small, inconspicuous area with a damp cloth. If the color doesn't come off on the cloth, it's likely washable.
-Non-Washable Walls (Distemper/Flat Matte Paint): Older homes or those with specific aesthetic choices might have flat, non-washable paint. Water can cause this type of paint to streak or rub off. For these, dry cleaning methods (like erasers or gentle sanding) are your best friends.
When in doubt, always test your cleaning solution in an unseen corner, like behind a piece of furniture or in a closet.
The Stain-Solving Toolkit: Your Kitchen is Key
You might be surprised at how many powerful cleaning agents are already in your kitchen. Here’s what to have on hand:
-Baking Soda: A gentle, non-abrasive scrubber and odor neutralizer.
-White Vinegar: A natural acid that cuts through grease and dissolves alkaline substances like hard water stains and crayon wax.
-Dish Soap: Designed to cut through grease and grime on dishes, it works just as well on walls.
-Rubbing Alcohol (Isopropyl Alcohol): Excellent for dissolving ink and sanitizing surfaces.
-Hydrogen Peroxide: A mild bleach alternative that helps with discoloration and sanitization.
-A Spray Bottle: For easy application of solutions.
-Microfiber Cloths: These are superior for cleaning as they are highly absorbent and less likely to leave lint behind compared to paper towels.
-Magic Eraser (Melamine Foam): A fantastic tool for tough scuffs, but use it sparingly as it works like a very fine sandpaper and can remove a gloss finish if used too aggressively.
The Stain Directory: A Room-by-Room Guide
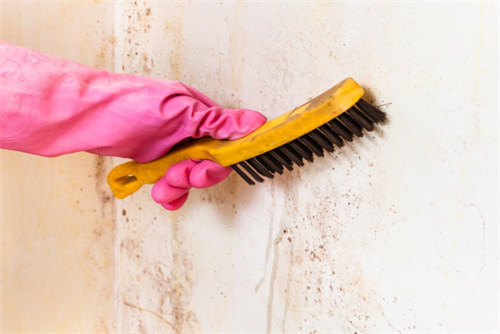
1. The Bathroom & Damp Areas: Conquering Mold and Mildew
Mildew isn't just unsightly; it can trigger allergies and damage your walls. It thrives in damp, poorly ventilated spaces.
The Science Bit: Mold is a fungus. Bleach (sodium hypochlorite) is effective because it kills the surface spores and lightens the stain. Vinegar (acetic acid) is also a potent antifungal agent.
a. Deep Clean Method
Protect Yourself: Wear gloves and open a window for ventilation.
The Solution: In a spray bottle, mix a solution of 1 part bleach to 10 parts water. For a non-bleach alternative, use undiluted white vinegar.
Apply: Lightly spray the affected area. Don’t soak the wall.
Wait: Let it sit for 10-15 minutes to allow the solution to penetrate and kill the spores.
Clean & Rinse: Lightly scrub using a soft-bristled brush or cloth. Wipe the area clean with a separate cloth dampened with fresh water.
Dry Thoroughly: This is the most important step! Pat dry with a towel to remove all moisture.
Mold will return if the area stays damp.
b. Long-Term Prevention
Ensure Proper Ventilation: Keep the bathroom fan running during your shower and for at least 20 minutes afterward.If you don’t have a fan, crack a window.
Wipe Down Walls: After a steamy shower, a quick wipe-down of tile walls with a squeegee or towel can work wonders.
Mold-Resistant Paint: When it’s time to repaint, invest in paint specifically formulated for bathrooms and kitchens. These contain mildewcides to inhibit future growth.
2. The Living Area: Brightening Yellowed White Walls
White walls can yellow due to age, sunlight oxidation, or smoke. The solution depends on your paint type.
a. For Washable Walls: The Toothpaste Trick
Toothpaste is a mild abrasive, perfect for gentle scrubbing.
Use a non-gel, white toothpaste.
Apply a small amount to a damp cloth or an old toothbrush.
Lightly scrub the yellowed area in a circular motion, then use a separate damp cloth to wipe away any residue.
Dry with a soft towel.
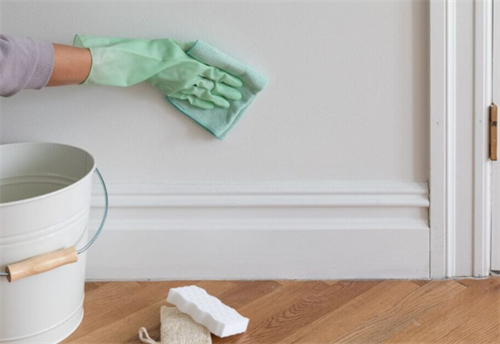
b. For Non-Washable Walls: The Vinegar Solution
Combine one teaspoon of white vinegar and one teaspoon of dish soap in a cup of warm water.
Dip a cloth into the solution, wring it out until it’s just damp.
Gently dab at the stain. Do not rub vigorously.
Use a dry cloth to absorb the moisture and residue immediately.
3. The Kid’s Room: Removing Stickers and Tape Residue
Stickers and tape leave behind a frustrating gunk that seems impossible to remove.
The Oil Method: Oil breaks down the adhesive bond.
Choose an oil: cooking oil, baby oil, or even mayonnaise works.
Apply a small amount directly to the residue.
Allow it to sit for 5–10 minutes to loosen the glue.
Gently rub away the residue with a cloth. The sticker should slide right off.
Wash the area with a little dish soap to remove the oily film, then rinse and dry.
4. The Kitchen: Erasing Grease and Food Splatters
Grease is a stubborn enemy in the kitchen. It needs a agent that can cut through it.
The Baking Soda Paste:
Make a thick paste with baking soda and a little water.
Spread the paste over the greasy spot and let it sit for several minutes.
Scrub gently with a soft cloth or sponge. The baking soda will absorb the grease and lift it away.
Wipe clean with a damp cloth.
The Degreasing Spray:
Mix equal parts white vinegar and water with a few drops of dish soap in a spray bottle.
Spray onto the grease spot, let it sit for a minute, then wipe clean.
Pro Tip: For tiles, a paste of cream of tartar and hydrogen peroxide applied for 30 minutes can tackle even baked-on grease.
5. Every Room: Banishing Pen, Pencil, and Crayon Art
Kids will be kids, and their creativity often finds its way onto the walls.
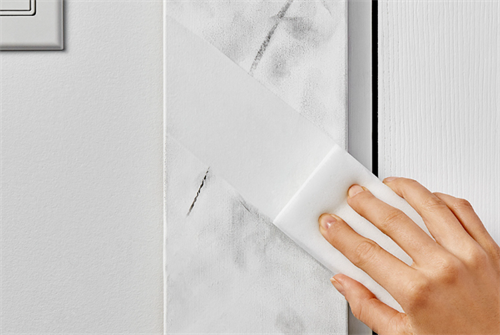
Pencil Marks: The easiest fix! A standard pencil eraser will take care of it without any fuss.
Crayon and Wax-Based Marks:
Heat Method: Hold a hairdryer a few inches away from the mark to soften the wax. As it softens, wipe it off with a paper towel.
Vinegar Method: Dampen a cloth with vinegar and wipe the area. The vinegar’s acidity aids in dissolving the wax.
Ink and Marker:
Water-Based Ink: A damp magic eraser often does the trick.
Permanent Marker: This is where rubbing alcohol shines. Dampen a cotton ball with alcohol and blot the stain. Don’t rub, as this can spread it. The alcohol dissolves the ink, transferring it to the cotton ball.
6. The Hallway: Fixing Scuffs, Scratches, and Nail Holes
High-traffic areas are prone to scuffs from shoes, bags, and furniture.
For Scuffs: A dry magic eraser is often all you need. For tough stains, sprinkle a bit of baking soda onto a damp sponge and scrub gently for best results.
For Small Nail Holes: The Crayon Trick
This is a brilliant rental-friendly hack!
Choose a white crayon that closely matches the color of your wall.
Use a lighter to gently warm the tip until it just begins to melt.
Carefully dab the melted crayon wax into the hole, overfilling it slightly.
Once cooled, scrape the excess wax flush with the wall using a credit card or your finger—it will nearly disappear!
For larger holes, you’ll need a spackling paste and a putty knife, but for the tiny holes from picture hooks, the crayon method is a lifesaver.

Building a Wall Care Habit: Prevention is Everything
Dust Your Walls: Every few months, use the soft brush attachment of your vacuum cleaner or a microfiber duster to remove dust and cobwebs from corners and baseboards. This prevents dirt from building up and becoming ingrained.
Address Spills Immediately: The longer a spill sits, the harder it is to remove. Blot liquids immediately and deal with the stain right away.
Strategic Decorating: In playrooms or kids' bedrooms, consider installing whiteboard or chalkboard panels. It gives them a dedicated space to be creative and protects your walls.
Touch-Up Paint: When you paint a room, always keep a small jar of the paint for touch-ups. A small artist's brush is perfect for covering tiny chips and scuffs before they become eyesores.
With these simple, natural solutions, you can maintain the beauty of your home, ensuring its walls continue to provide a clean, bright, and welcoming backdrop for all your memories to come.
RELATED GUIDES
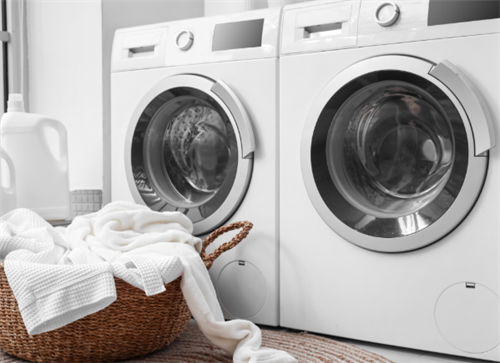
A Guide to Washing Machine and Dryer Upkeep
As early autumn’s chill sets in, line-drying clothes becomes a hassle—making washers and dryers essential for modern households.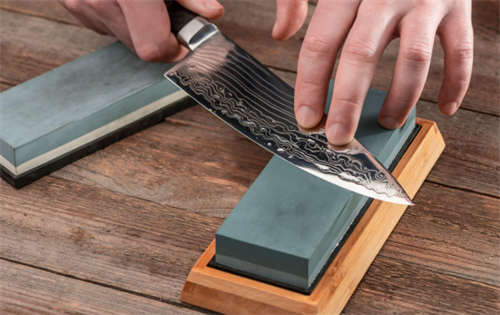
How to sharpen kitchen knives at home?
At the center of every kitchen is a set of knives—tools we use every single day, whether for slicing vegetables, filleting fish, or carving a Sunday roast.
Preventing Smart Homes from Being Hijacked by Hackers: 7 Key Security Steps
Smart homes promise convenience, comfort, and even energy savings by connecting everyday devices—like lights, cameras, locks, and thermostats—to the internet.
Whole House Audio vs. Smart Speakers: Which Audio System Is Right for You?
Music isn’t merely background—it can shape the atmosphere, influence your mood, and enrich daily life.As technology has advanced, homeowners now have multiple ways to enjoy audio throughout their homes.