Is your toilet leaking? A simple DIY guide to fix uneven water flow in the toilet, saving you money and more money
The toilet tank is constantly refilling, or worse, water is steadily flowing into the bowl. Your first thought is one of pure dread—not just for the annoyance, but for the impending plumbing bill.
Inhale deeply, then lift the phone to contact a plumber.In my years of homeownership, I’ve learned that a constantly running toilet is one of the most common—and most fixable—household issues. The culprit is almost always one of a few small, inexpensive parts inside the tank. With a little DIY spirit and about 15 minutes of your time, you can likely solve the problem yourself and keep that money in your pocket.
First Things First: Understanding How Your Toilet Works
You don’t need to be a certified plumber to fix a toilet; you just need a basic understanding of the mechanics inside the tank. Think of it as a simple system of floats and flaps designed to manage water.
When you activate the flush lever, it pulls a chain connected to the flapper, allowing water to pour into the bowl. As the tank drains, the float—either a ball-on-a-rod or a cup-type mechanism—descends with the dropping water level.This falling float triggers the fill valve to turn on, refilling the tank with fresh water.
As the tank fills, the float moves upward along with the water level.Once it reaches a pre-set height, it signals the fill valve to shut off. It’s a beautiful, simple cycle. A running toilet means this cycle has been interrupted. Something is preventing the water from shutting off completely.
Step 1: The Initial Investigation — Lifting the Lid
Your mission begins by looking inside. Carefully take the tank lid off from the back of the toilet.Place it on a soft towel on the floor to avoid any accidental chips or cracks.
A quick safety note: The water in the tank is clean (it’s the same fresh water that comes from your taps), so don’t be afraid to get your hands in there. Just make sure to shut off the water supply first if you’re doing any work beyond a simple adjustment. The water shut-off valve is typically found on the wall pipe either behind or next to the toilet.Turn it clockwise to shut it off.
Now, look at the assembly inside. You’ll see the major components:
-The Fill Valve: The tall assembly on the left (usually) with a vertical pipe. This is where fresh water enters the tank.
-The Float: This is either a classic ball float attached to a metal arm or a more modern plastic cup that slides up and down the fill valve’s shaft.
-The Flapper: The rubber seal at the very bottom of the tank, connected to the flush lever by a chain.
-The Overflow Tube: The open pipe in the center. Its job is to drain excess water into the bowl if the water level gets too high, preventing a flood.
Flush the toilet and watch the process in action. Don’t put the lid back on yet. Observe what happens. Where is the water coming from? Is the water level rising too high and pouring into the overflow tube? Or is water leaking past the flapper into the bowl even when the tank is still? Your observation here will point you to the culprit.
The Three Most Common Culprits (And How to Fix Them):
Culprit #1: The Misadjusted or Faulty Float
Observation: Water flows non-stop into the overflow tube. The tank water level exceeds the tube’s height, and the fill valve does not close.
The Problem: The float is set too high, telling the fill valve to keep pumping in water long after it should have stopped. Alternatively, the float itself might be waterlogged (if it's the ball-style kind) and no longer buoyant enough to rise properly.
The Fix:
For a Ball-and-Arm Float: Look at the end of the metal arm. The ball float is attached. You’ll see a screw where the arm meets the fill valve. Turning this screw clockwise (usually) will bend the arm downward, telling the valve to shut off at a lower water level. Give it a quarter turn, flush, and see where the water stops. The recommended water level is approximately one inch below the overflow tube.Adjust until you get it right.
For a Cup-Style Float: This is even easier. The float cup moves along the fill valve’s shaft. You’ll notice a spring-loaded clip or release button—just press the clip and slide the cup down the shaft.This will lower the water level at which it triggers the shut-off. Again, aim for that one-inch mark below the overflow tube.
For a water-filled ball float, give it a light shake.If you can hear water sloshing around inside, it’s time for a replacement. These are cheap and universal—any hardware store will have one. Take out the old piece by unscrewing, and secure the replacement in its place.
Culprit #2: The Worn-Out Flapper
The Symptom: You don’t see or hear water flowing into the overflow tube, but you can hear a faint trickle into the bowl, and the tank periodically refills to top itself up even when no one has flushed it recently.
The Issue: The rubber flapper at the base of the tank has warped, deteriorated, or accumulated mineral buildup. It can no longer form a tight seal over the drain hole, allowing water to slowly leak out. The toilet, sensing the water level has dropped (even though no one flushed), kicks on the fill valve to top it up.
The Fix:
Turn off the water supply at the wall valve.
Push the flush lever to release most of the water from the tank.
Inspect the Flapper. Look at the rubber. Is it cracked? Does it feel brittle? Is it covered in slimy mineral build-up?
Clean it. Sometimes, a good scrub with an old toothbrush can remove mineral deposits and restore the seal.
Check the Chain. Allow a bit of slack in the chain from the flush lever to the flapper when the flapper is shut.If it’s too tight, it can prevent the flapper from sealing all the way. If it’s too long, it can get trapped under the flapper and cause a leak. Adjust the chain hook to a different link until you have about half an inch of slack.
Replace it. Flappers are inexpensive (typically $5-$10) and are the most common part to wear out. To replace it, simply note how the old one is attached (it usually unclips from the pegs on either side of the drain hole and detaches from the chain), and clip the new one into place. Make sure you get a similar model—taking the old one to the hardware store is a good idea.
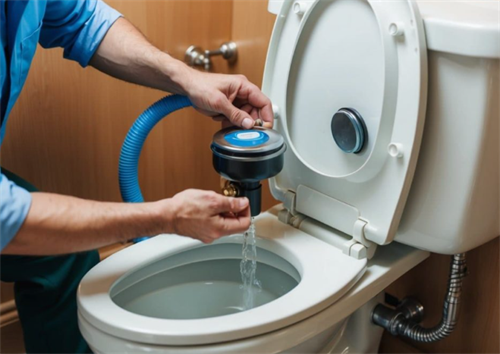
Culprit #3: The Faulty Fill Valve
The Symptom: The toilet runs constantly, or the fill valve makes a loud, screaming or hissing noise while refilling the tank. You might also see water spraying or dripping from the valve itself.
The Problem: The internal seals and diaphragms inside the fill valve have worn out. It’s simply old and can no longer shut off properly or quietly.
The Fix: Replacement.
While this sounds intimidating, replacing a fill valve is a straightforward job and the parts are cheap (around $20).
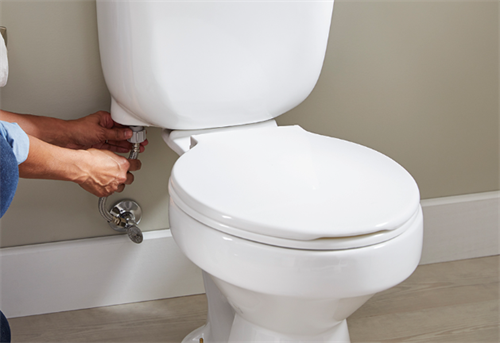
Shut off the water valve, flush to drain the tank, and use a sponge to soak up any leftover water at the bottom.
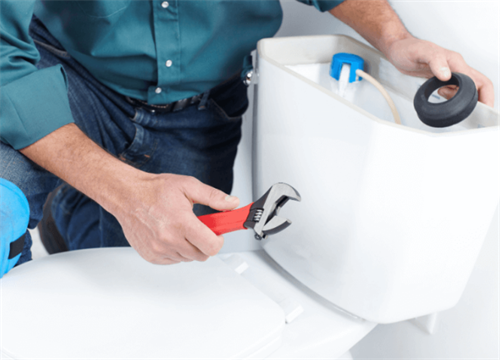
Disconnect the supply line. There’s a large plastic nut on the underside of the tank that connects the fill valve to the water supply. Unscrew it (you may need channel-lock pliers).
Remove the old valve. There will be another large nut under the tank holding the valve in place. Remove this screw, and the entire valve assembly will come out.
Install the new valve. Follow the instructions on the new valve’s box. It usually involves setting the height correctly for your tank, dropping it in, and tightening the nut from below.Connect the supply line and hook the chain back onto the flapper.New models are often universal and much quieter and more efficient than old ones.
Turn the water back on, let the tank fill, and check for leaks. Adjust the float on the new valve to set the correct water level.
A Word on Cleaning Products: Preventing Future Problems
Many of us use in-tank cleaning products like bleach tablets or "blue blocks." While convenient, these can accelerate the deterioration of your flapper and other rubber parts inside the tank. The constant, concentrated bleach can make the rubber brittle and cause it to fail prematurely.
A better alternative is to use a liquid-based toilet cleaner that hangs from the rim of the bowl instead of sitting in the tank. It cleans just as effectively without degrading your toilet’s internal components.
Knowing When to Call a Professional
The vast majority of running toilet issues are solved by adjusting or replacing the float, flapper, or fill valve. However, if you’ve tried these fixes and the problem persists, the issue might be more complex, such as a crack in the overflow tube or a problem with the flush valve seal beneath the flapper. If you’re uncomfortable proceeding, seeking help from a professional plumber is a safe choice. You can at least tell them what you’ve already tried, which can help them diagnose the problem faster.
RELATED GUIDES

Are Your Smart Devices Monitoring You? A Guide to Privacy in Smart Homes
After a long day, you finally sink into the couch. With just one voice command, the lights lower, your favorite playlist starts, and the thermostat sets itself to the ideal temperature.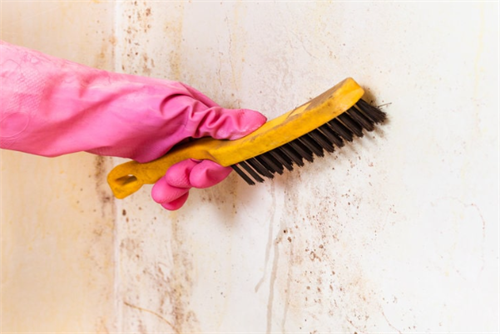
Wall Stain Removal Guide—Make Your Home More Beautiful
Between the hustle and bustle of daily routines, the joyful chaos of children and pets, and the simple passage of time, our walls can take a beating.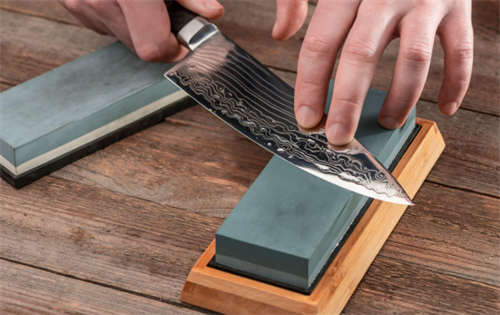
How to sharpen kitchen knives at home?
At the center of every kitchen is a set of knives—tools we use every single day, whether for slicing vegetables, filleting fish, or carving a Sunday roast.
The Kitchen Work Triangle: The Ultimate Guide to Designing a Efficient, Enjoyable Culinary Space
The kitchen is more than just a utilitarian space for preparing meals; it’s a vibrant hub where morning coffee fuels the day’s ambitions.