Essential household repair skills—Save time and money for you

A faucet that drips relentlessly, a drain that refuses to swallow water, or a door that sticks on a humid day—these are the small but frustrating breakdowns of domestic life. Much like a sudden headache or a common cold in humans, these household "ailments" can disrupt your daily routine and peace of mind.
Before you rush to call a professional and open your wallet, know that many of these issues have simple, do-it-yourself solutions. Equipping yourself with a handful of essential repair skills can transform you from a flustered homeowner into a confident problem-solver. This guide provides a comprehensive toolkit of practical, easy-to-follow fixes for the most common household problems. These aren't just quick tips; they are foundational skills that extend the life of your home's components and bring the satisfaction of self-reliance.
1. When Your Front Door Becomes Rebellious
Modern three-in-one smat locks are marvels of technology, but they can have their off days.
The Key Turns, but the Door Won't Open: This often happens due to slight misalignment from settling or weather changes. Before you panic, try applying upward pressure on the handle while gently pushing the door inward or outward as you turn the key. This slight adjustment can often reseat the latch bolt and allow it to retract smoothly.
A Flickering Keypad Display: This is the lock’s way of crying out for help. It almost always indicates low battery power. It’s a wise practice to change your smart lock’s batteries on a regular schedule, much like you do your smoke detectors.
A Stiff or Gritty Lock Cylinder: If your key is difficult to insert or turn, moisture and dirt are likely the culprits. Don’t use oil, which can attract more grime and gum up the mechanism. Opt for a graphite lubricant—if needed, a regular pencil will do the job. Rub the pencil lead along the ridges of your key, insert it into the lock, and work it in and out a few times. The graphite will serve as a dry lubricant, ensuring smoother performance.
2. Restoring Your Faucet’s Full Flow
There’s nothing more annoying than a faucet that has lost its water pressure, turning a simple task like filling a pot into a test of patience. This is usually due to mineral buildup from hard water blocking the aerator, the tiny screen at the tip of the spout.
The fix is surprisingly simple and requires no tools, just a little white vinegar.
Dip a small ball of cotton or a paper towel in regular white vinegar.
Wrap it around the faucet head, ensuring the clogged aerator is fully covered.
Secure it with a rubber band or a small plastic bag and let this vinegar compress work its magic for about 20-30 minutes.
Remove the compress and turn on the water. You should see a significant improvement as the dissolved minerals flush away. For a thorough cleaning, you can often unscrew the aerator by hand and soak it directly in vinegar overnight.

3. Reviving a Lazy Showerhead
A showerhead clogged with limescale delivers a pathetic, unsatisfying trickle instead of an invigorating spray. The solution is almost identical to the faucet fix and just as effective.
Pour about a cup of white vinegar into a sturdy, small plastic bag.
Hang the bag over the showerhead and fasten it snugly to the pipe with a rubber band or twist tie, making sure the nozzles are fully submerged in the vinegar.
Leave it for at least an hour, or even overnight for heavy buildup.
Remove the bag and turn on the water. You may need to gently scrub the nozzles with an old toothbrush to dislodge any remaining bits of scale. The result is a like-new showerhead that works perfectly.
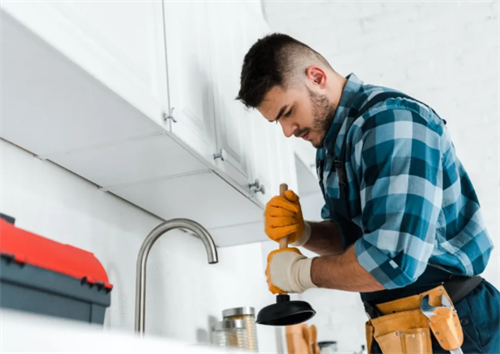
4. Conquering a Clogged Toilet Without a Plunger
A blocked toilet is a household emergency that can cause instant panic. Before you reach for the plunger (or the phone), try this ingenious and mess-free trick using only plastic wrap.
Completely wrap the toilet bowl with layers of plastic wrap, overlapping them and pressing the edges firmly against the porcelain to create a tight seal.
Flush the toilet. The plastic will begin to bulge upwards as the water has nowhere to go.
Apply gentle but firm pressure with your hands on the domed plastic. This forces the air pressure down through the drain, which can effectively push or dislodge the obstruction.
The sudden release of pressure and the force of the water will often clear the clog completely. Carefully remove and discard the plastic wrap. This method is clean, quick, and astonishingly effective for minor blockages.
5. Silencing Squeaks and Fixing Loose Fixtures
Over time, windows, cabinets, and doors can develop squeaks, looseness, and minor alignment issues.
Squeaky Window Tracks or Cabinet Hinges: The solution is often simple lubrication. After wiping away dust and grime, a small amount of petroleum jelly or specialized silicone lubricant applied to the track or hinge will silence the squeak beautifully.
A Loose Window Handle or Cabinet Knob: The constant turning usually causes the tiny screws underneath to work themselves loose. Use a Phillips-head screwdriver to gently tighten them. If the screw turns but doesn’t grip, you may need to replace it with a slightly longer one or use a matchstick dipped in wood glue inserted into the screw hole to provide a new anchor point.
A Dragging Cabinet Door: This is usually a matter of adjusting the hinges. Many contemporary hinges come with adjustment screws, enabling you to shift the door vertically or horizontally.A small turn of a screwdriver can make a world of difference.

6. Taming Peeling Wallpaper
A curling corner of wallpaper can ruin the look of a room. Fixing it is easier than you think.
Carefully lift the peeling section and use a small brush to remove any old, dried glue or dust from both the wall and the back of the paper.
Use a syringe or a small paintbrush to spread a thin layer of wallpaper adhesive (readily available at hardware stores) onto the exposed wall surface.
Gently press the paper back into place, starting from the center and smoothing it outward to eliminate air bubbles.
Use a clean, damp sponge to wipe away any excess glue that seeps out.
For a quick fix on a small corner, a dab of white glue and a blast of heat from a hairdryer can reactivate the existing adhesive and seal it back down.
7. Changing a Lightbulb Safely and Correctly
It seems like the simplest task, but doing it safely is key.
Make sure to begin by switching off the power at the wall switch every single time.For an extra layer of safety, turn off the circuit breaker for that room.
Let a burned-out bulb cool down fully before handling it, particularly halogen bulbs, as they can become very hot.
Use a steady step stool or ladder to reach the fixture safely. Never overreach while standing on a chair.
Gently unscrew a standard bulb by rotating it to the left.Place the new bulb in the socket and turn it clockwise until it’s secure.Do not overtighten, as this can crack the bulb’s collar or damage the socket.
Restore power and test the light.
Being handy at home has less to do with natural ability and more to do with approaching tasks with curiosity and patience.Start small, invest in a basic toolkit (a good screwdriver set, an adjustable wrench, pliers, and a measuring tape), and don’t be afraid to look up video tutorials for visual guidance. Knowing how to perform these essential repairs is more than just a way to save money—it’s a form of empowerment.
RELATED GUIDES

Mastering Sealant Application: The Key to a Durable and Beautiful Home
When it comes to home improvement and interior design, many people focus on large elements—furniture, lighting, flooring, or color schemes.
Is Your Sofa Toxic? Understanding Flame Retardants and How to Avoid Them
You’ve probably spent more time on your sofa over the past few years than ever before. It’s been your office, your movie theater, your weekend nap zone, and the spot where you unwind after a long day.
Marble vs. Quartz Countertops: The Ultimate Guide for Your Kitchen Remodel
Hey there, home renovators and kitchen lovers!Let’s talk about one of the biggest decisions you’ll make during a kitchen remodel: the countertops.
Preventing Smart Homes from Being Hijacked by Hackers: 7 Key Security Steps
Smart homes promise convenience, comfort, and even energy savings by connecting everyday devices—like lights, cameras, locks, and thermostats—to the internet.